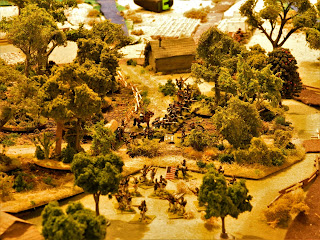
The photo above taken from the south western approach looking down Purdy road towards Shiloh church shows how close the Confederate and Union troops start to each other.
North of the hornets' nest and advancing Confederate army Union troops enjoy a relaxing morning puttering around their tents:
Sherman's troops stationed around Shiloh church are amongst the first to discover the impending attack:
As are Peabody's brigade under Prentiss; they are the first to be pushed from their positions- their Commander killed in battle- falling back in spectacular fashion to the sunken road:
Confederate troops, following up hit the peach orchard and the outer border of the hornet's nest:
With their comrades fleeing towards their encampments the other Union troops eventually realise that there is a battle in progress:
As Union reinforcements start to arrive, marching up both Corinth roads, Peabody's brigade (after offering very light resistance while ensconced in a good defensive position) again flee! In the photo below, Prentiss attempts to regroup them at the encampment while another brigade prepares to advance into the woods in an attempt to re-take the eastern end of the sunken road:
In the foreground, more union troops under Mclernand form up outside their camp while in the distance, Sherman's troops continue to stall the Confederate advance on the Union right:
There the confederates are hampered by 'too many officers, not enough troops' syndrome:
Confederate reinforcements enter the table, headed for the meat grinder that was the hornets' nest:
Their arrival helps secure the sunken road and puts them in a good position for the Union counter attack:
The view from the Confederate left shows them having swept away the last of Sherman's brigades including mortally wounding the great man himself:
Pulling a page from the Confederate hand book, the union commanders decide to feed brigade after brigade into the hornets' nest in an attempt to push the resilient confederates off of the sunken road:
It is at this point we called the game although there were still several more turns to play. Technically it was a draw but it looked like a confederate victory was very possible. For a complete victory the confederate had to control the sunken road (no Union troops on it) and push to the north-eastern corner of the battle field, essentially corralling union troops against the river. Both sides seem to be playing for a draw as Sherman's efforts on the union right stalled the confederate advance long enough for Union troops to reorganise and reinforcements to get into position. Both sides seemed to be critically hamstrung by dire maneuvre rolls at key times, including a string of them that caused disorder and retiring moves on the union left .
In the end the Union held the western end of the sunken road (but their position there was tenuous at best) and the confederates held the centre and eastern end (with nearby union troops reeling in disorder):
In a similar vein to our Battle of Gaines Mill the terrain really dictated how the battle would be fought and, indeed, played out in nearly identical fashion to the actual event.


Yes, terrible ground to have a battle on, favoring the defender in most of the close-in actions.
ReplyDeleteOdd how the game hinged on the same piece of ground that the actual battle did as well. Perhaps that is down more to the conditions for victory as detailed in the scenario rules than anything else- hard to say.
DeleteA lovely-looking game, and I often think it's nice when some of the events follow the original. We had a refight of Talavera five plus years ago which sticks in my mind for the same reason.
ReplyDeleteOne of the things I think we chose to do differently than the original commanders was feed troops into the hornets'nest instead of withdrawing to the road that goes to Pittsburgh Landing. In the end, the result was virtually the same.
DeleteWow! Great looking relight of the battle of Shiloh.
ReplyDeleteHow’d your terrain piece of the Hornets nest work out?
I’d love to play in that game. Most F&F scenarios are designed to give a feel for the historical battle by setting the victory conditions to taking/holding the same key battlefield features; really helps make the battle feel more...historical. 😀
I’m with Lawrence and Stew. Your Shiloh game looks superb. Nasty terrain to fight over, no doubt.
ReplyDeleteExcellent ! Great looking table.
ReplyDeleteWe had a regimental Shiloh refight last april (pictures on my blog). That's my favorite CW battle and I already think to play it again.
Franck
Hello Apa, I just read your game account- fantastic looking game!
DeleteGreat looking game, just got the 2nd edition scenario book this weekend. Need to schedule a club game.
ReplyDeleteWonderful job on the table; I agree fully!
ReplyDeleteHello Costicker from a Codhead. I just found your site via Max Foy's blog Prometheus in Aspic. Great looking terrain. Gives that busy, constrained feel for ACW battlefields.
ReplyDeleteSuperb look to the battle !
ReplyDelete