Sunday 28 October 2018

Battle of Gaines' Mill Terrain; Part 2

The bulk of the hills are done. In retrospect, I should have used 2" styrofoam or 2 layers of the 1". This is my first terrain designed specifically for 15mm miniatures and I think I erred on the small side.

After the adhesive and sand dried I marked in the roads and starting adding brush in the valleys:
As the battle took place on June 27th. I stayed away from browns and golds as my one trip to Virginia was in July and I was impressed with how lush everything was. The valleys around the hills are mostly forest and swamp and between them is Boatswain Creek. 

As I didn't take pictures of every stage I will give you a rundown of the various steps and follow that up with a number of pictures of the finished hills. I flocked all the hills in 2mm Woodlands Scenics Medium Green and Light Green static grass; doing it in patches and varying the mix to create a little diversity. Then more shrubs and bushes using Woodland Scenics Lichen, Medium Green and Light Green Clump Foliage, Scenic Express Coarse Turf (light and medium green) and some leafy shrubs of my own making. Then some Silflor 4mm Summer grass static grass along the bottom edges of the hills. Then the final touch was to spray the tops with adhesive (I used LePages Spray Adhesive) and sprinkle a mix of Woodland Scenics Coarse Turf (light and medium green) and Scenic Express SuperLeaf (medium green).


Next up: trees.


Monday 8 October 2018

ACW Table: The Battle of Gaines' Mill

As variety is the spice of life, I am mixing it up a bit and going back to a project I started in August: making hills for a ACW re-fight of The Battle of Gaines' Mill. This post shows my texturing process for the hills. Here are the hill components in carved foam laid out on a GW grass mat:
With these hills I decided to smooth out the cut marks from the hobby knife and hot foam cutter. The pictures show before...
During:
...and after:
At this point it gets a bit messy.  A LAF member mentioned using tile/floor adhesive for texturing buildings; as I do quite a bit of DIY stuff around here I had 2 buckets of the stuff. When I built my Pulp Alley Airstrip table I experimented with it and was very happy with the results. I combined coloured sanded grout with the tile adhesive to darken it and add some (very) fine grit to the texture. For these hills I mixed Tobacco Brown sanded grout with the adhesive:
After mixing, the goop was smeared at intervals with a putty knife:
... and rolled this out with a medium pile roller followed by a foam roller:
As the adhesive takes 24 hours to set you can add lots to the hill: rocks and small bushes will easily adhere and you will have an hour or 2 before the adhesive starts to skin.

At this point I got a little off track. My intention was to have sporadic patches of fine sand here and there, with most of the hills heavily flocked. However, I forgot to strain my sand and then started throwing it around rather generously:
Too much rock for hills that are supposed to be grassy, especially for 15mm figures. I may have to knock some of the bigger aggregate off. A good flocking will hide quite a bit of the rest.

The hills as they currently stand:
Still missing are two smaller hills, including the one which sits adjacent to Gaines' Mill in the upper right hand corner of the photo above. Next weekend, after large amounts of 2mm grass and some shrubbery, and these hills will be done. As quite a bit of the gully is forested,  a collection of trees will have to be mustered.

Monday 1 October 2018

Another New Project: A New Table For Trumpeter's Salute 2019

My partner in crimes against the hobby is Murdock of Murdock's Marauders. He came up with a plan for a scenario for Trumpeter's Salute 2019: a game based on the siege in the historical drama By The Sword Divided. 

In the series the Lacey's ancestral castle, Arnescote Castle is besieged by Parliamentarian forces; Arnescote castle is, in fact, Rockingham Castle:
This won't be a straightforward table with a castle at one end though. Murdock's plan is to have siege options for the attacker: scale the walls; build saps and trenches; and/or attempt a breach. The trick with this table is modelling the saps, trenches and any breaches. We wanted the attacker to be able to place trenches and saps where he wished and to target specific sections of the wall for making a breach. The means flexibility in terrain. 

We decided that the centre of the table would consist of removable 8 inch squares, thus allowing the attacker to remove a plain square and replace it with a square consisting of a trench or sap section. The wall of Arnescote Castle would also be in 8 inch sections, so that any breached sections could be removed and replaced with rubble. Here is a drawing to give you an idea of what we are looking for:
The wall of Arnescote castle is on the left, the attackers first parallel on the right. The besieged wall is (we believe) the wall on the right in the photo of Rockingham, partially obscured by the tree in the lower right-hand corner. The edges of the table will be solid; the dotted in lines give you an idea of the sections that could be pulled out and replaced with trenches or saps as shown. The defenders will also have the option to build trenches or counter saps; I am not sure how often this was actually done during the ECW (I did read of one siege in which the defenders counter-mined to prevent the blowing of a gate) but in the TV series the Lacey's are shown digging a trench outside the wall in anticipation of the Parliamentarians attack.

The table is 4x6 and started out like this:
The centre was removed:
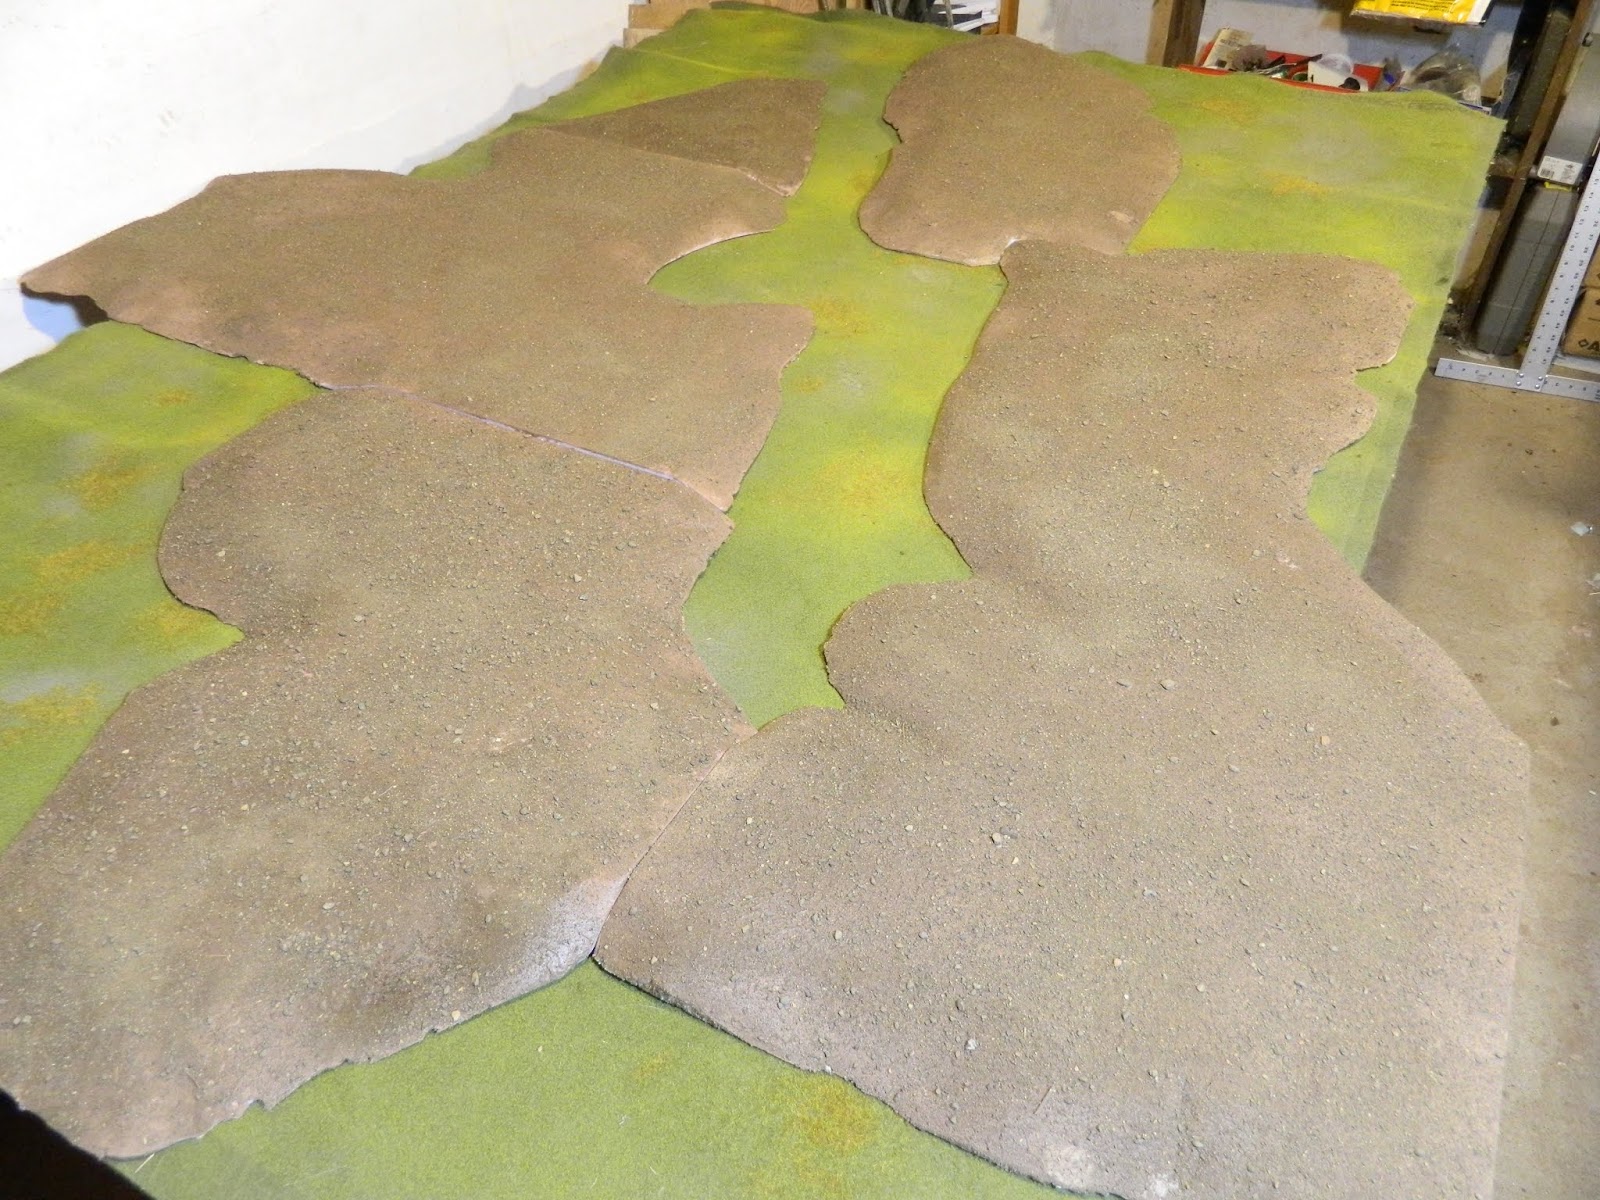
Then I started the time consuming process of making 8 inch squares. I made a little jig to help with keeping the edges a even as possible:


The progress so far:

Remember, I have to make nearly twice as many squares so there are lots of options for the attacker. There will be 28 plain grass squares and about another 20 squares that will be either trenches or saps. You can see why I am starting this now even though Trumpter's Salute isn't until March...

I  mocked up a trench section on a foam off-cut to get an idea of what it might look like:

The trench may have to be a bit wider and smaller wood for the shooting step. Perhaps more rocks and gravel scattered around as well.