Showing posts with label ACW. Show all posts

Monday, 11 November 2019

15mm ACW Buildings From JR Miniatures

With an eye to another Fire and Fury game (possibly Corinth) sometime in the future I picked up some JR Miniatures 15mm ACW buildings from Meeplmart in Toronto.
The first building I tackled was Winter Quarters (JRM1630).
The detail in the windows was shallow but actually came out OK.  The shingles and the siding was rife with small bubbles. Something that was to become a bit of an issue with these buildings was the casting; poorly mixed resin is my guess. As it is a plain structure it has a lot of uses and would not be out of place for a century afterwards.

The nicest of the three buildings both in sculpting and in casting is Victorian House (JRM1608). Only a few bubbles here and there but the texture of the stone and the shingles is excellent.
 The black pitting in the window frames are air bubbles; they made painting the recessed windows a bit of a challenge.
The worst offender for casting issues was the 1859 Factory (JRM1611). The stonework was completely pockmarked. In the pictures below you can see the bubbles in the window frames and the roofing and the massive piece missing from the eave.
 The building itself is a little twisted as shown by the cockeyed windows.
Judging from the faded printing on the boxes these buildings had sat for quite some time at Meeplemart. I hope whoever is making these buildings now (if they are still in production) pays a little more attention to quality control as when they come out right they are nice buildings and fun to paint.

Monday, 19 August 2019

Battle Of Shiloh

This Sunday past Murdock, his son and I, traveled down to the War Dungeon where another Brigade Fire and Fury battle was being hosted by Nate and McLean.
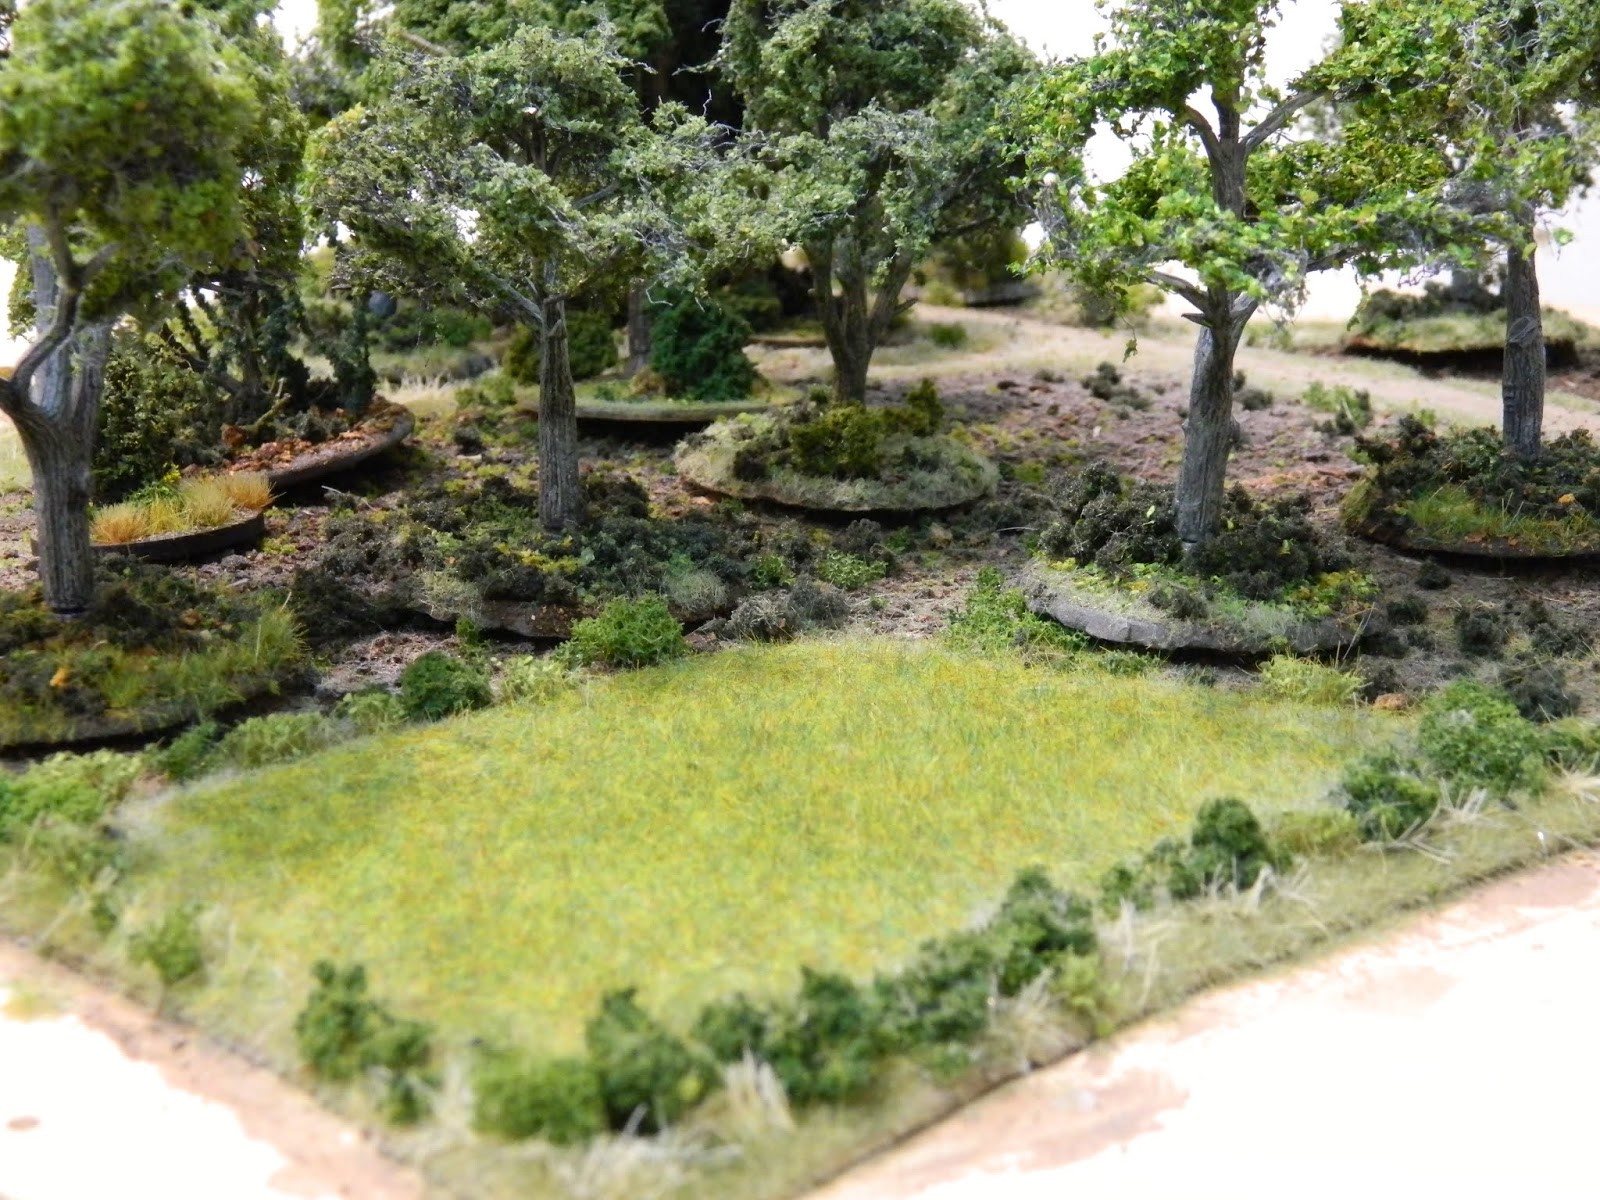
The photo above taken from the south western approach looking down Purdy road towards Shiloh church shows how close the Confederate and Union troops start to each other.

North of the hornets' nest and advancing Confederate army Union troops enjoy a relaxing morning puttering around their tents:
Sherman's troops stationed around Shiloh church are amongst the first to discover the impending attack:
As are Peabody's brigade under Prentiss; they are the first to be pushed from their positions- their Commander killed in battle- falling back in spectacular fashion to the sunken road:
 Confederate troops, following up  hit the peach orchard and the outer border of the hornet's nest: 
With their comrades fleeing towards their encampments the other Union troops eventually realise that there is a battle in progress:

As Union reinforcements start to arrive, marching up both Corinth roads, Peabody's brigade (after offering very light resistance while ensconced in a good defensive position) again flee! In the photo below, Prentiss attempts to regroup them at the encampment while another brigade prepares to advance into the woods in an attempt to re-take the eastern end of the sunken road:
In the foreground, more union troops  under Mclernand form up outside their camp while in the distance, Sherman's troops continue to stall the Confederate advance on the Union right:
There the confederates are hampered by 'too many officers, not enough troops' syndrome:

Confederate reinforcements enter the table, headed for the meat grinder that was the hornets' nest:
Their arrival helps secure the sunken road and puts them in a good position for the Union counter attack:
The view from the Confederate left shows them having swept away the last of Sherman's brigades including mortally wounding the great man himself:
Pulling a page from the Confederate hand book, the union commanders decide to feed brigade after brigade into the hornets' nest in an attempt to push the resilient confederates off of the sunken road:
It is at this point we called the game although there were still several more turns to play.  Technically it was a draw but it looked like a confederate victory was very possible. For a complete victory the confederate had to control the sunken road (no Union troops on it) and push to the north-eastern corner of the battle field, essentially corralling union troops against the river. Both sides seem to be playing for a draw as Sherman's efforts on the union right stalled the confederate advance long enough for Union troops to reorganise and reinforcements to get into position. Both sides seemed to be critically hamstrung by dire maneuvre rolls at key times, including a string of them that caused disorder and retiring moves on the union left .

In the end the Union held the western end of the sunken road (but their position there was tenuous at best)  and the confederates held the centre and eastern end (with nearby union troops reeling in disorder):

In a similar vein to our Battle of Gaines Mill the terrain really dictated how the battle would be fought and, indeed, played out in nearly identical fashion to the actual event.


Sunday, 11 August 2019

Angry Piper's Terrain Challenge: Part 2

The first piece for The Angry Piper's Terrain Challenge is complete.
The trees were mostly made before hand; the base for the Hornets' Nest was the focus of this part of the challenge:
I glued some thin cork sections down, in two layers; smoothed the transitions with drywall mud before a light sanding and then my patented mix of sanded grout and vinyl tile adhesive was smeared all lover it. Careful to avoid the roads (but I forgot about the Bloody Pond) , I sprinkled ground fir bark on top and pressed it firmly into the grout/adhesive mixture while it was still wet. Once dry a layer of watered down white glue to seal it and then a sprinkling of Woodland Scenics dark foliage for light undergrowth.
 Then some 2mm static grass, followed by brush and bushes to finish it off. This view shows "bloody" pond with the Sunken Road running along side of it:
Wicker field in the north-east corner of the piece:
Looking north, up the Eastern Corinth Road (the intersection with the sunken road just visible in the middle of the picture):
Looking north west along the sunken road, it bends to the right behind the trees, after crossing the Eastern Corinth Road:
I think I may make a couple more snake rail fences to demarcate the boundary between the hornets'  nest/sunken road and Duncan's field. Not entirely necessary though as I have some made up, they are just a little long.


Monday, 3 June 2019

The Battle of Gaines Mill

Finally, several months after finishing the hills for this game we were able to coordinate everybody to re-fight this battle. It turned out to be a special gaming experience for me as the host, McLean, whom I had never net before, has quite a "basement". It is in fact a museum as he is an avid collector of WW2,WW1 and Korean War equipment, weapons, uniforms and other incidentals associated with those conflicts.

He has fashioned the entrance to The War Dungeon after a trench, largely based on a WW1 trench but with elements from WW2 and the Vietnam war.

Inside you walk through the WW1 section...
that includes various rifles used by the combatants:

There is also a Korean War section:

My favourite section is the display of the uniforms and memorabilia of his family members that served in WW2:
Including his great grandfather's bomber jacket, medals and book of memoirs (each silver bomb represents a mission flown):

In his memoirs Mr. Henderson recounts how one of the gunners shot down a German fighter over Holland (if I am not mistaken); the clock in the lower right was recovered from German fighter plane shot down over Holland in the same month of that year...


Anyway, the real reason we were there: the Battle of Gaines Mill (pictures are from my phone as I forgot my proper camera and tripod so some may be a little fuzzy and are dark). The rules used were Brigade Fire and Fury. AP Hill's Confederate force prepare to assault across Boatswain's Swamp: 

The view from the southeast looking over Sykes command:
DH HIll's forces move south from Old Cold Harbour:
Sykes redeploys to meet a new threat and at the left hand edge of the picture you can see some brigades arriving from reserve:

DH Hill's division puts pressure on Buchanan's brigade :
Morrell's division prepares for the onslaught behind hastily erected defences:
.. which comes crashing in:

Successive waves would eventually break and push the Union brigades out of their defenses; it was the beginning of the end. The picture below shows Sykes' division and it's reinforcements pushed back up Turkey Hill to Adam's Farm by DH Hill's:
I
The game played out almost exactly as the real battle with the exception of the Confederate attack across Boatswain's Swamp going in about an hour earlier. The Union forces were pushed back and with the late reinforcements having to keep the retreating brigades from getting out flanked, more or less played the same role as they did on June 27th 1862.

The atmosphere, the combatants and fun game made for a great day out.


Sunday, 19 May 2019

Still Pecking Away...

 After Trumpeter's Salute I took some time away from doing hobby stuffs. A number of Real Life projects had been sidelined while my time and energy was preoccupied with the siege table. Now that I am caught up (sort of) I am back to spending my evenings and some of my weekends painting and building.

A number of small items that I did not finish in time for Trumpeter's  were first on the list. Some resin ladders from Firedragon Games:

A metal supply wagon from Warlord Games:

And a metal hay wagon from Elladan (a very nice little kit):

Currently on the work bench are some more of Jeff's ECW cavalry and some trees and a couple of bridges for our Battle of Gaines Mill which we will be fighting on June 2nd:
I recently received my first Empress figures; two teams of oxen with limbers. I really look forward to painting them; there are no other oxen teams for the ECW available that I know of  in 28mm.