Monday, 2 August 2021

The Battle of Freezing Hill

 The last Sunday of July saw Murdock and I resume our ECW campaign with The Battle of Freezing Hill, a prelude to the main event, Lansdowne Hill.

After scouting out Lansdowne Hill the previous day, Lord Hopton's Royalist force returned the following morning to occupy it only to discover that William Waller's army had ensconced itself at the crest of it in the meantime. 

After deploying for battle and seeing the Waller had no intention of leaving Lansdowne Hill, Hopton retired towards Marshfield. Waller sent out a harassing force and Hopton was obliged to present some of his army as a rearguard; this battle is the result.

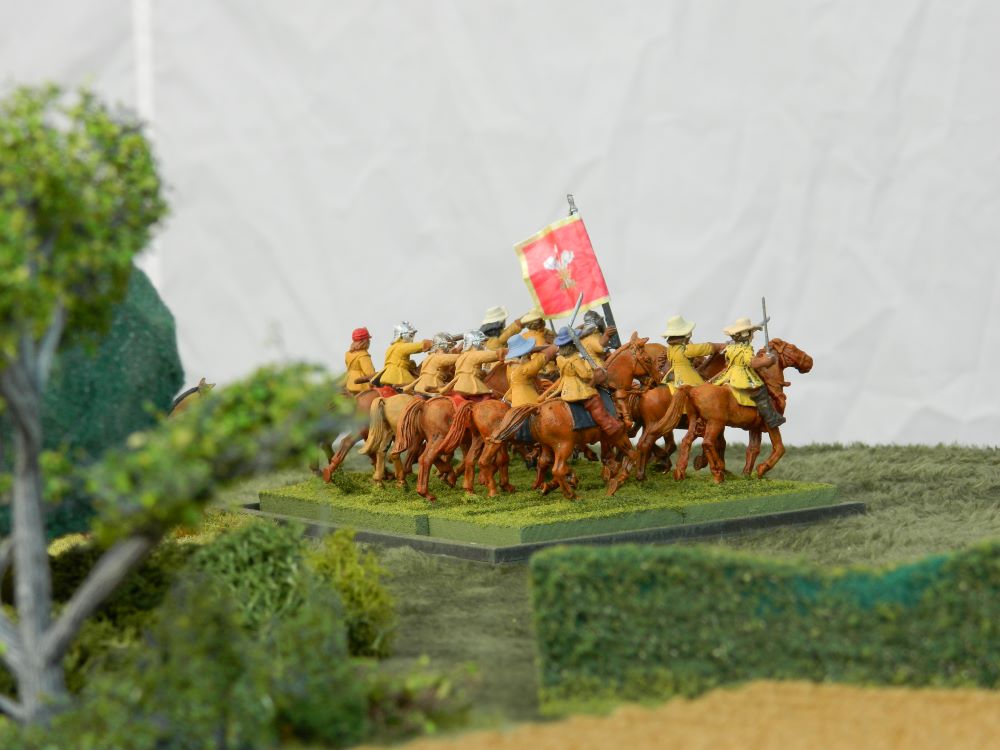
  The Royalist rearguard; Hopton's dragoons in the forefront with Howard's and Vaughan's in the middle; commanded shot in the middle distance with more of Howard's and Vaughan's horse on their flank and more commanded shot in the far distance:

The Parliamentarian pursuit force made up largely of  small divisions of horse from Col. Robert Burghill's regiment of horse, the Gloucestershire Horse and Waller's horse...

.... with Waller's Dragoons and the Somerset Dragoons sneaking up the flanks in amongst the hedges:


Col. Thomas Howard's horse await the enemy:
Royalist commanded shot from Nicolas Slanning's regiment anchor the right flank... 

...trading musket fire with Waller's and the Somerset Dragoons:

Parliamentarian reinforcements show up early (equal to or less than the turn number on 2D6- snake eyes on turn 2!) pushing forward and the Royalist's (Howard's horse) respond with getting the first charge in:
Surely a Standard sized unit of gallopers with a commander attached and rear support, charging a Small unit of trotters would win, right? Sigh.... the photo below show the defeated Howard's horse as it breaks for the table edge:

In the turn following, the Parliamentarian dragoons win their musket duel with Hopton's dragoons... 


...  and send them on their way:

Eventually, the Royalist reinforcements arrive, in the form of Col. Trevannion's regiment of foot:

Not a moment too soon either as the Parliamentarian commander makes good use of his early reinforcements to start hemming the Royalist rearguard in:

With the arrival of the foot, Bennet's brigade of horse immediately follow,  making the battlefield a little less forlorn for the Royalists:

In the middle distance, the Royalist horse reinforcements move to fill the hole left by the defeated Howards horse:

Carnarvon's horse, with support, look to chase Waller's dragoons from the hedges on their flank but come up short in the charge:
Thus, they are exposed to a charge in the flank; they are unable to turn to face but their support is:

Although not a complete disaster, the veteran Carnarvon's horse are forced back.

Near the end of the game, this picture shows the Parliamentarian horse largely intact; the hole in the lower right recently vacated by Godolphin's commanded shot, breaking the Royalist foot battalia:
The final act of desperation by the Royalists, with the hope of inflicting some sort of damage on the Parliamentarian horse (who- on paper- were the inferior), is the charge of Howard's second unit of horse into their opponents. Nearly identical to the first charge of Royalist horse: a Standard unit of Gallopers, with flank and rear support charging a Small unit of trotters with only rear support. Sadly, an identical result as well as the snake eyes of the Break Test show:
With that, 3 of the 4 Royalist battalia were broken and officers started ordering regiments off the field. The best performing regiment for the Royalists was Slanning's regiment of foot, shown below before being ordered to retreat:


This game featured some wild die rolling from both parties right from turn 2 onwards. Oddly enough very few 3 move orders were rolled for on either side; the crazy die rolling seem to reserve itself for saves and break tests. In the past I have been a rather rash commander, a little reckless with my troops, however this time I was more conservative; sadly, my new approach did not change the Royalist's fortunes. Despite having the advantage of numbers and quality of horse I was unable to rack up a W. This leaves the Royalists 0-5 in our campaign series. 

You will have noticed some different paint jobs on some of the Royalist horse; I had to pilfer some from Jeff's collection as I seemed to have misplaced about a dozen of my own. As before, we used Warlord Game's Pike and Shotte rules with amendments from To Kill A King. Something to note is that we have not been using Blunders; we started the campaign without them and decided to carry on as is. Next up is Lansdowne Hill, which should be interesting...

Edit: The Parliamentarian version of the battle is available here.

Monday, 19 July 2021

Crimean War Turks

The Naniamo Historical Wargamers have taken on a new period: the Crimean War.


 A number of us each chose a Nationality or two and a batch order was put together by Nate through Eureka Miniatures USA ; I chose Ottoman Turks (the flags I ordered from Maverick Models).
 I haven't painted many 15mm figures (these are 18mm- close enough), just a few Xyston Carthaginians. The Ancients were easier as there is less detail on the figures whereas these figures have belts, pouches and hardware. Some of it is quite fine and it was sometimes hard to tell what was flash/miscast and what was sculpted and intentional. Younger eyes may have been beneficial.
Not a lot of free info on the intrawebs but the colours were pretty straightforward to paint: Prussian blue ( a little brighter in the photos than in reality) with a lots of red details. There are a few plates to view online, some blog posts and the Wargames Foundry pics from the webstore (which are not great) so I ordered Turkish Uniforms of The Crimean War  from Caliver Books, mostly for the info on the flag bearer and officers. 


As the Ottoman Turks play a relatively small part in the battles we have planned I have French on the painting table right now in similar numbers.
 

Tuesday, 29 June 2021

An Imaginations Game: Wars of Stagonian Aggression

 This past Sunday a few of us got together at Murdock's and rolled out the 18th century collection of our dearly missed friend Jeff (aka Jeff of Saxe-Bearstein, aka Bluebear Jeff).


The scenario was loosely based on one at the back of Warlord's Last Argument of Kings supplement for Black Powder, Cherbourg. In our case, it featured the army of Saxe-Bearstein, lead by Duke Otto Von Ranulfsson, retiring from a punishing campaign in Stagonia, and attempting to extract itself by evacuating it's infantry by jolly boats to waiting ships at the mouth of the river. Once per turn a regiment on the table edge could be removed; however Stagonia had a mortar battery that could hamper the evacuation with a successful die roll of 5 or 6 once per turn. 

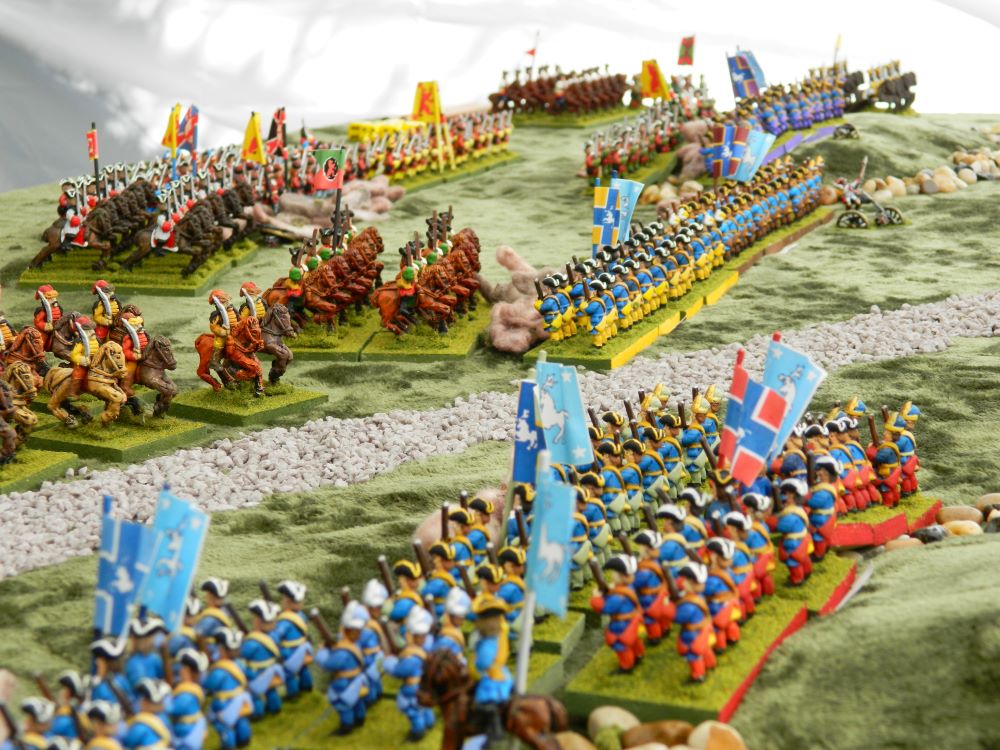
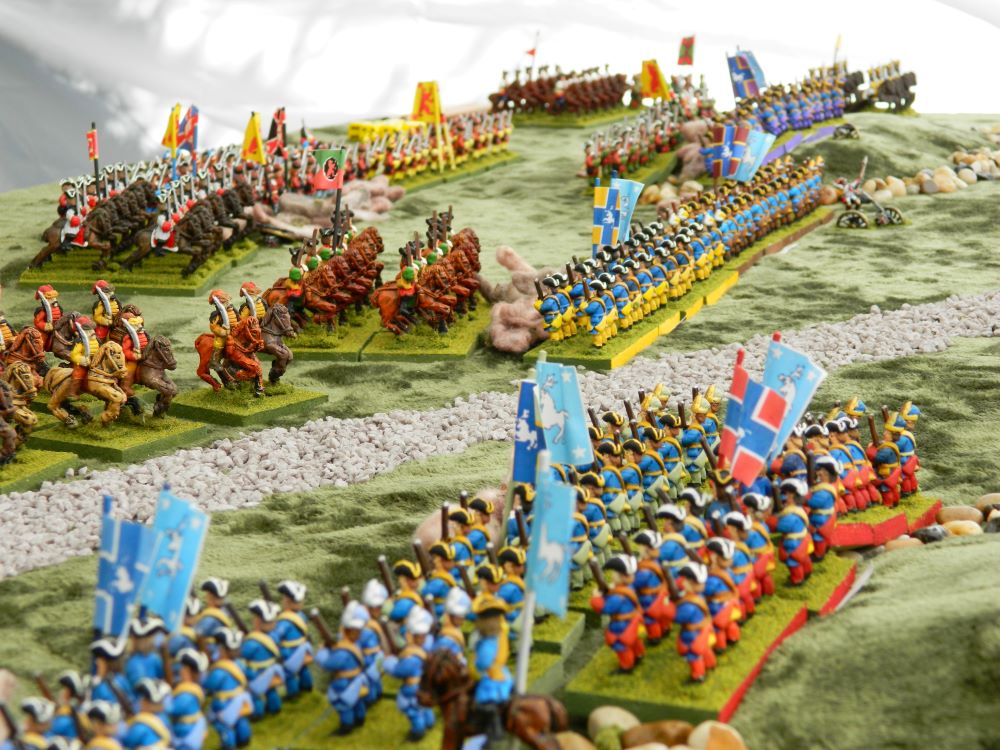
At deployment, things looked positive for Saxe-Bearstein as a number of Stagonian regiments started in reserve and one of their own was ready to board some boats when their turned arrived. Saxe-Bearstein in the forefront, Stagonians advancing onto the table:
Things turned sideways though as the Stagonian mortars found their target for their first two turns increasing the boarding time from 1 turn to 3! With such luck so early on it became apparent that Saxe-Bearstein would have to concentrate on the fight and not the flight! The Stagonians prepare to advance on the re-organised Saxe-Bearstein in the distance:
On the other flank, Saxe-Bearstein grenzers patroled...
.... before the Saxe-Bearstein cavalry go on the offensive:

Stagonian infantry pressed forward to musket range:
After a strong start, the Stagonian command staff led by Le Comte Roberge Le Ferrier had a difficult time getting troops follow orders, often stymied on the first order.
On the Saxe-Bearstein left flank the cavalry battle continued with much toing and froing, eventually the horse commanders from both sides get involved in an effort to break the stale mate:
With the battle winding down, Ranulfsson attempted to smash through the centre with his elite cavalry. 

Although they were successful in pushing back the veteran Stagonian infantry, they themselves were shaken and unable to follow up their success. The creme de la creme of Saxe-bearstein cavalry, the Von Comocks Kuirass, before they retired from the field:
The cavalry battle on the Saxe Bearstein left flank and in the middle ultimately achieved nothing for either side, the horse brigades both ending up broken. This last photo is from mid/late in the battle just before the final push: 

Sunset and attrition forced the Stagonians to leave the Saxe-Beastein force stranded on the beach. Although a victory for Stagonia (Saxe-Bearstein was unable to extract a single regiment) it was a Pyrric one as they quit the field with a broken army. Aside from the lucky strikes with the mortars early on, which forced Ranulfsson to adjust, consistent poor command rolls stalled the Stagonians, especially late in the game when Le Ferrier and his commanders could not Rally units, leading to broken brigades. This failure of the leadership is what turned this game from a great victory to a very costly one for Stagonia.

Jeff's collection is made up entirely of Bloodaxe Miniatures, no longer in production, painted in Deltacoat and Ceramacoat craft paint in a bold, simple style with a flat finish. They make for very colourful armies on the table top. The buildings are also from his collection, and are from a Christmas village collection (not sure the brand) the style of which really suits the figures.

Rules used were Black Powder with stats based on the Prussian Seven Years War list in Last Argument of Kings. As usual, regiments that Jeff listed as Veteran were given the Steady and Elite4+ rule. A few units Jeff had labeled Superb and they were given Superbly Drilled in addition and a couple foot regiments were also given an extra pip of Stamina. These made for very steady regiments. 

Murdock broadcasted the game live over Twitch and will no doubt have an edited version available sometime in the future.


Sunday, 16 May 2021

A Very Hot Dispute

 After a nearly year long layoff from playing games face to face, Murdock and I were able to resume our campaign series from Partizan Press' English Civil War Campaign Scenarios, Vol 1. After Stoke Lane the next scenario in line is the Battle of Monkton Farleigh.

With the Royalist army advancing on Bath and controlling the main bridge over the Avon at Bradford-on-Avon, Waller had a bridge built across the river near Claverton and sent a flanking force across it led by Col. Robert Burghill. He deployed the main body of the army on Claverton down (I should note here that Google maps has Monkton Farleigh just under a kilometre and a half to the east of the Avon and Claverton to the west whereas the map in the scenario book has them on opposite sides of the river. Given the distance from the Avon to the village, you could play this game without the river or the outskirts of Monkton Farleigh on the table.)

Although this is an attempt at an ambush by Burghill's force, the Royalists are aware of it and have sent a force under Prince Maruice with Col. William Godolphin supplying reinforcements. 

The view of the Prince's army from Monkton Farleigh hill:

The bulk of Burghill's infantry and 2 light guns set up in a strong defensive position in a walled enclosure:

Early on the Royalist skirmishers are sent packing and the horse of both sides on the Royalist right eagerly rush forward into contact while the Earl of Carnarvon issues orders (mounted figure on the extreme left):
 Col. Trevanion's regiment of foot leads the way taking the bulk of the fire from the defenders:
Eventually they are forced to retire, allowing the newly arrived Godolphin's foot to take their place. They soon suffer much like Trevanions:

With Godolphin's and Hertford's foot stalled, the combined regiments of Col. Buck's and Prince Maurice's moves out to the right, forming a semi circle around the defended enclosure and the light gun is unlimbered. In the distance the Royalist horse have forced their opponents back, however, despite repeated charges, they are unable to inflict enough damage to force them off the table or break the command. Instead it was the Royalist horse that was spent:
Still, the defenders hang on; 
 Parliamentarians continued to rally off Shaken markers and fight Disorder while the Royalist large veteran regiments soaked up the hits and use their Elite status to shed Disorder. With only two turns left it came to the final push; the Royalist infantry closed in on the defenders:
Alas for the Royalists, despite their best efforts they failed to make any of the defenders run and in their turn the Parliamentarians finally managed to force the pride of the Royalist force to retire, immediately followed by Prince Maurice's and Col. Buck's. With that, the foot battalia was broken and could not fight anymore. 

A different outcome from the actual battle. In reality, the Royalists forced the Parliamentarians out of the enclosure, back across the Avon capturing their guns in the process.

Right up until the last two die rolls of the game (both Break Tests which were promptly failed in spectacular fashion) it felt like the Royalists could drive the rebels off. I never got to fire my ordnance as it was continually masked by my foot regiments so I could have done better there.  

For those that are interested we used Warlord Games Pike and Shotte rules with unit stats from the To Kill A King supplement. Standard units consisted of 6 stands (24 figures); Small units of 3 stands (12 figures) and the Large 9 or 10 stands (36-40 figures).  All 4 of the Royalist foot regiments were Large. The horse on both sides were Small as the horse regiments involved were broken down into two divisions each.  The units marked out as Veteran in the force listing received the Elite 4+ and Steady special rules, Units marked as Raw got the Wavering special rule. The Parliamentarian Dragoons had Firelocks.


Saturday, 20 March 2021

AHPC Final Entry: Dark Ages Irish

 Well, the Analogue Hobbie Painting Challenge XI has come to a close and my final entry is 8 Dark Ages Irish from Crusader Miniatures.

A while ago I picked up about 4 points of Irish for Saga. The minis are a mix of Footsore and Crusader.
I liked the look of the Crusader Irish- the mix of bare chests, cloaks and vests- so I ordered 8 more.
In Saga terms these are warriors, armed with javelins.
Although there are 8 figures, there are only 4 poses, but not a big deal. They were fun to paint and painted up both quickly and well.

I may collect a few more as I have a Anglo-Norman force for Lion Rampant and with a suitable Irish force they could face off against each other in games set in the Anglo-Norman invasion of Ireland.


Tuesday, 2 March 2021

Welcome To Brewsterville

 I have ventured into a new gaming period: the Old West. A few (several?) months ago DaveB and I ordered up some Brigade Games miniatures from their American West range. Even before I selected my figures I knew that I wanted to name them after characters from song. 

The first one I painted was Henry Waits Alone:

Old horse thief moon
shine down upon us
from Medicine Hat
to Writing-on-Stone
shine deep in the canyons
shine deep in the coulees
shine down on Henry Waits Alone
- Horse Thief Moon, Ian Tyson

Henry is a fictional character, possibly based on or inspired by someone Mr. Tyson knew. On his album Live at Longview he sings the last line of that verse as "Henry, he waits all alone". It is unclear if the intention is to represent Henry as First Nations but that is how I chose to paint him. Stands Alone is not an uncommon surname amongst some First Nations on the prairies.

Next up I painted Lil Joe The Wrangler:
Little Joe the wrangler
will wrangle ne'ermore
his days with the roundup they are o'er
was a year ago last April when he rode into our camp
a little Texas stray and nothing more
-Little Joe The Wrangler,  N. Howard Thorpe (traditional)

This was my favourite to paint of the 6. I picked this figure for Little Joe as he was the youngest looking of the 9 I have. In the song Joe is clearly much younger than this figure as he gives his reason for leaving home as 'his new ma whooped him every day or two' (probably about 11-13 years old or so).

The next figure in the queue is un-named- simply referred to as "the stranger" in the traditional cowboy song, The Zebra Dun:
we were camped out on the prairie
at a bend on the Cimarron
when along comed a stranger
he stopped to argue some
he looked so very foolish
setting there alone
we thought he was a greenhorn
escaped from some town
- Zebra Dun, traditional

This mini was the most 'urban' looking of the old west figures I have so he got painted up as The Stranger on account of the fancy cut of his jacket, his nicely trimmed moustache and military style riding boots ( a possible explanation for why he was  mistaken for a 'greenhorn, escaped from some town'). 

Yavapai Pete is a fictional character from a poem by Curley Fletcher. There are actually two versions of the song; one paints Pete as a hard as nails cowboy and the other as a criminal. I chose the former.
Yavapai Pete was a cowpuncher neat
from Arizona's fair clime
he lived in the saddle and punched most the cattle
from here to the Mexican line

his ridin' was sassy, his ropin' was classy
he liked to mix mingle with maul
not much of a thinker, was more of drinker
could hold up his end of a brawl
- Yavapai Pete, Curley Fletcher

With the bushy beard and large floppy hat I though he looked the wildest of the figures I have.  Although it doesn't really come across in the photo, he has a bit of a fierce, intense countenance without looking nuts.

Another cowboy classic is Windy Bill:
Windy Bill was a Texas man 
an' he could rope you bet!
a steer that Windy hadn't tied 
he had not met him yet
but the boys they talked of a little black steer 
who was a kind of a bad outlaw
he lived down in the malpais
at the foot of a rocky draw
-Windy Bill, traditional

Windy comes across as a bit of a classy dude; when he fails to bring the steer in he "pays his debts like a little old man, without no bit of jaw". My preference would be for him to be wearing chaps and I considered sculpting some but they would have covered up his lovely boots and time was also a consideration.

The final figure is inspired by a song about a true cowboy, Bob Fudge:
My name is Bob Fudge
I was born in Texas
Lampasas County
back during the war
small pox and Comanches
took most of my family
left my poor brothers
my mother and me
-Bob Fudge, Ian Tyson

I chose this figure to represent Bob Fudge largely because he seemed the least aggressive or confrontational. Mr. Tyson's biographical song does not suggest Mr. Fudge was anything more than a cowboy who loved the lifestyle: riding the ranges of Montana and ranching.

Every Old West game needs a rural town for a setting; mine is Brewsterville, the name an homage to both my partner in this endeavour and the Fraser Valley gold rush town of Barkerville, currently a living history museum in the interior of British Columbia.
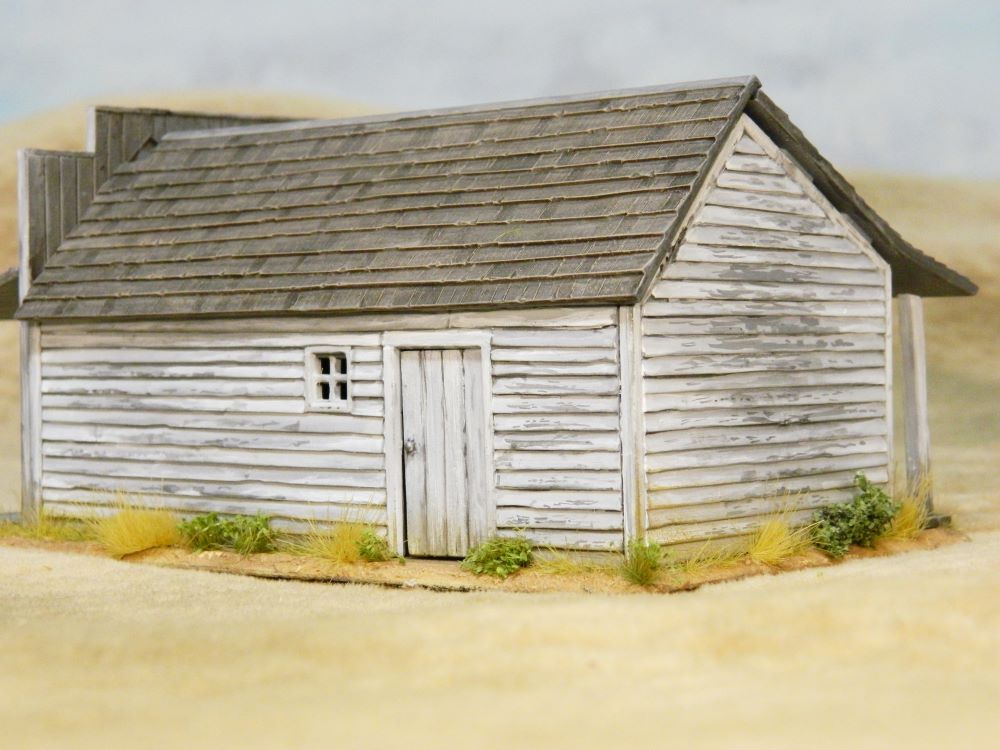
This first building for this gold rush town is the Perry Miniatures North American store.

A great little kit, easy to assemble bit it may be a little fragile for skirmish play as it is made from thin styrene like a scale model kit.

I imagine that back in the day, true paint would have been a rare commodity in the west so those that could made due with whitewash and stain. 

Even still the harsh weather would have taken it's toll, causing the thinned paint to fade and peel.

I enjoy putting this one together and I have the North American Church stashed somewhere. I will probably also buy the North American house kit; the kit is the same as the store but an end wall without the false front is available. 
Perhaps a third barn...


Saturday, 13 February 2021

More Conquest Games Archers

Last week I was able to finish off 6 more Conquest Games' plastic Medieval archers.


After assembling and painting the previous 6 I had a better idea of how to proceed with these ones.

I was able to achieve a more natural posing but the head/torso issues are still there.

Some of the heads are really nice pieces of sculpting. Conquest has managed to get the facial features nicely pronounced without being exaggerated. They are easy to paint; you can achieve a nice result without being Da Vinci.

Here is all 12, equaling 1 point of Levies in Saga: