With these hills I decided to smooth out the cut marks from the hobby knife and hot foam cutter. The pictures show before...
During:
...and after:
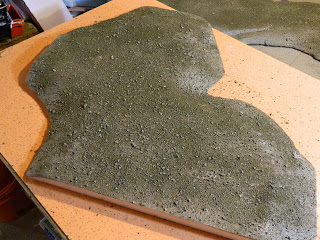
At this point it gets a bit messy. A LAF member mentioned using tile/floor adhesive for texturing buildings; as I do quite a bit of DIY stuff around here I had 2 buckets of the stuff. When I built my Pulp Alley Airstrip table I experimented with it and was very happy with the results. I combined coloured sanded grout with the tile adhesive to darken it and add some (very) fine grit to the texture. For these hills I mixed Tobacco Brown sanded grout with the adhesive:
After mixing, the goop was smeared at intervals with a putty knife:
... and rolled this out with a medium pile roller followed by a foam roller:
As the adhesive takes 24 hours to set you can add lots to the hill: rocks and small bushes will easily adhere and you will have an hour or 2 before the adhesive starts to skin.
At this point I got a little off track. My intention was to have sporadic patches of fine sand here and there, with most of the hills heavily flocked. However, I forgot to strain my sand and then started throwing it around rather generously:
Too much rock for hills that are supposed to be grassy, especially for 15mm figures. I may have to knock some of the bigger aggregate off. A good flocking will hide quite a bit of the rest.
The hills as they currently stand:
Still missing are two smaller hills, including the one which sits adjacent to Gaines' Mill in the upper right hand corner of the photo above. Next weekend, after large amounts of 2mm grass and some shrubbery, and these hills will be done. As quite a bit of the gully is forested, a collection of trees will have to be mustered.


That’s nice progress on the hills. Now following the blog so I can see how it develops. I’ve yet to try much with foam so I’ll be paying attention. 😀
ReplyDeleteGood job!
Very impressive
ReplyDelete